Why integrate Atlassian JIRA MCP Server with Cursor?
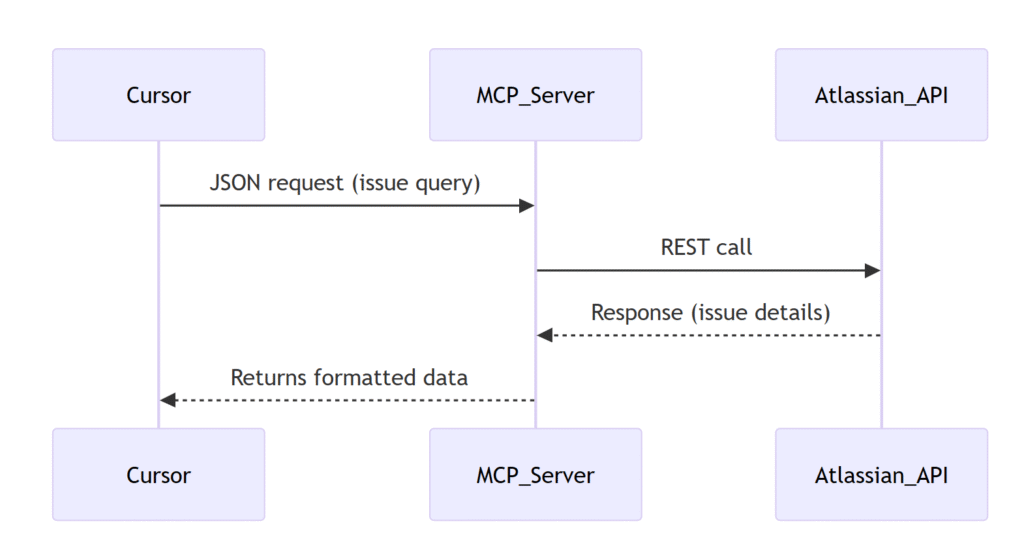
Atlassian JIRA MCP Server in Cursor lets developers connect Jira and Confluence directly into their coding environment using the Model Context Protocol (MCP). This integration eliminates context switching, allowing you to query issues, update tasks, and fetch documentation without leaving Cursor. This guide shows you how to set up the Atlassian MCP Server, explain the underlying configuration, and walk through common troubleshooting scenarios.

Prerequisites
Before starting, ensure you have:
- Node.js v18+ and
npxinstalled. - A valid Atlassian Cloud account with access to Jira and Confluence.
- Required API scopes.
- Cursor updated to the latest version with MCP enabled.
How to configure JIRA MCP Tool?
Step-by-Step: Configure JIRA MCP Tool in Cursor
1. Navigate to Cursor Settings > Tools & Integrations


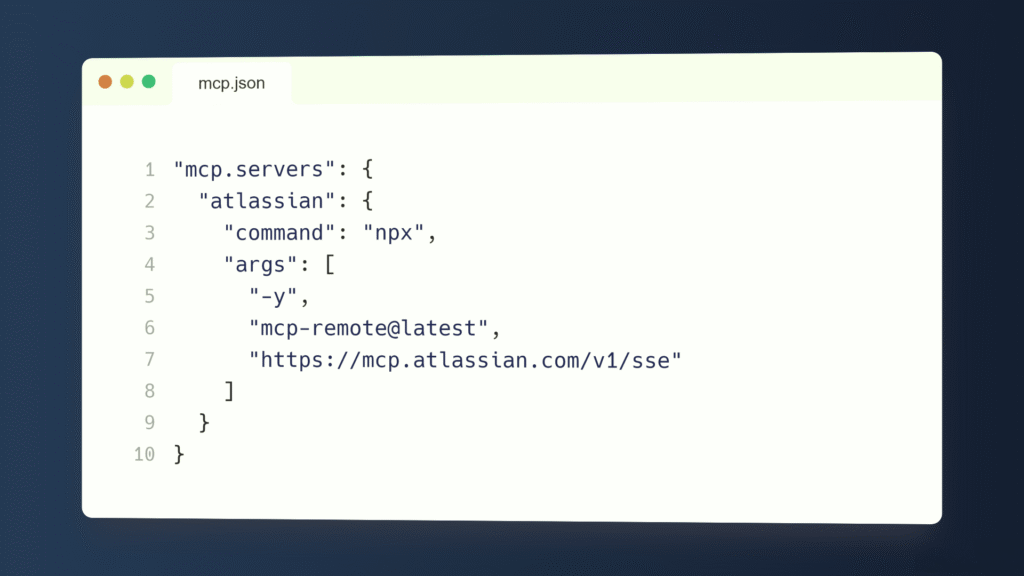
Click on Add New MCP Server. It will open mcp.json in the editor.

2. Add an mcp server block as following:
"atlassian": {
  "command": "npx",
    "args": [
      "-y",
      "mcp-remote@latest",
      "https://mcp.atlassian.com/v1/sse"
    ]
}
3. Save the file. An authorization window should popup. If doesn’t then try Disable -> Enable the ‘atlassian’ MCP Tool once.

4. Authorize the app for necessary access-rights, and you’re good to go.

5. Once the authorization is completed – you will see the number of tools available in the atlassian MCP Tool. This confirms that you have configured the atlassian JIRA MCP Tool successfully.
Now go ahead and try the available tools:

Few prompts you can try:
- List all JIRA issues assigned to me.
- Get the details of JIRA Issue # <jira-issue-id>.
- Fetch all open issues for me and categorize them priority-wise.
For latest information on this, please refer to the official docs:
- https://support.atlassian.com/rovo/docs/getting-started-with-the-atlassian-remote-mcp-server/
- https://www.atlassian.com/platform/remote-mcp-server
Summary
This article provides a step by step guide on how to configure the MCP tool for JIRA in Cursor editor. If you’re reading this later, the steps might change. Please refer to the official documentation in this case.
Happy Learning!!
